Task Dashboard
The Task Dashboard allows you to view task completion data across your locations for a selected checklist and date range. You can filter results, search by location, view comments and photos, and export data to a spreadsheet.
Getting Started
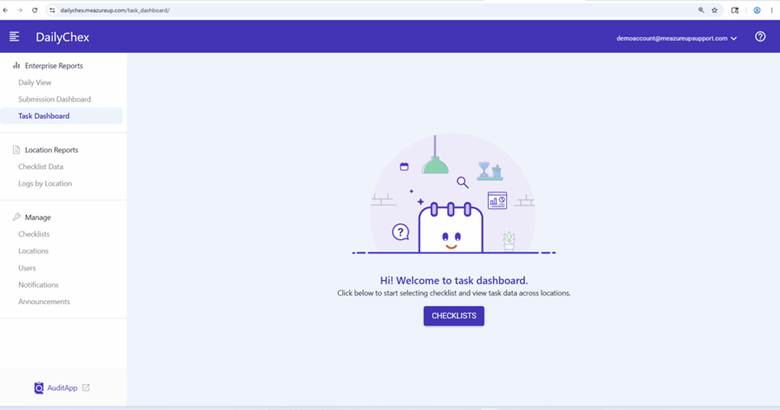
Under Enterprise Reports in the left navigation panel, select Task Dashboard. If no checklist has been selected yet, you will see a welcome screen. Click CHECKLISTS to begin.
Selecting a Checklist
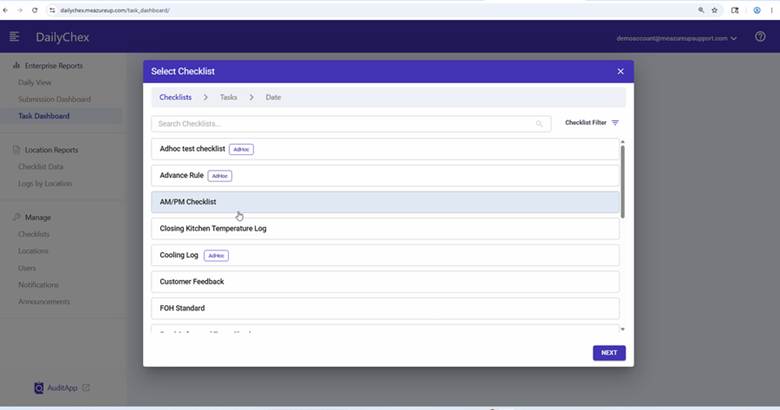
The Select Checklist dialog will open, showing all available checklists. You can search by name using the search bar at the top, or use Checklist Filter to narrow results. Click a checklist to select it (it will be highlighted), then click NEXT.
Selecting Tasks
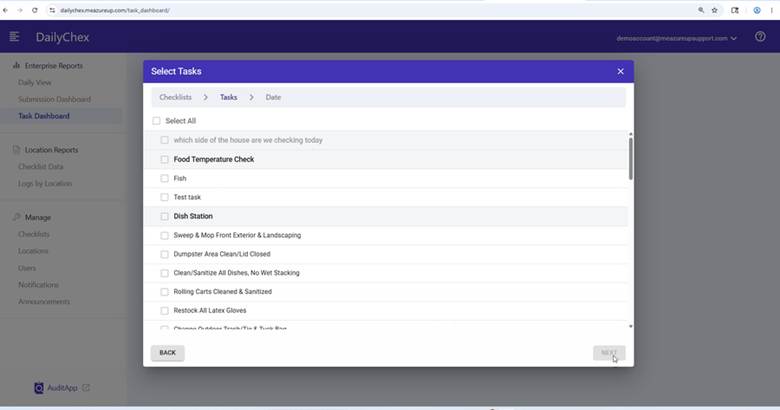
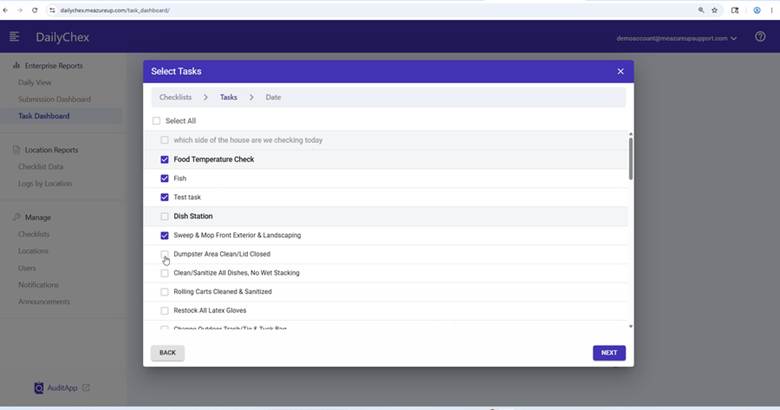
The Select Tasks step shows all tasks within the selected checklist. Check the box next to each task you want to include in the report, or click Select All to include every task. When you are done, click NEXT.
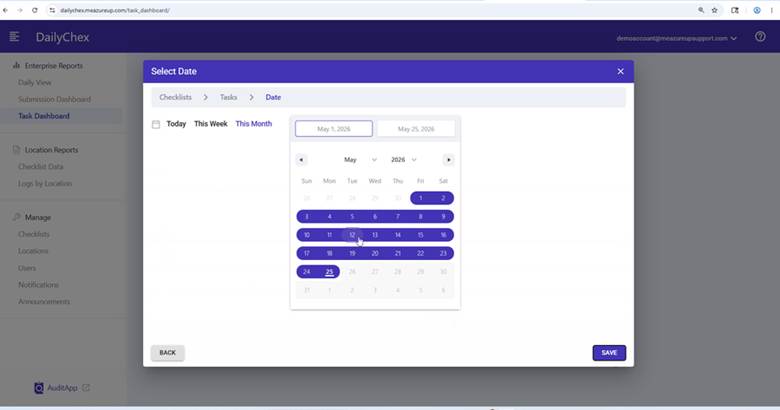
Selecting a Date Range
The Select Date step allows you to define the date range for your report. You can use the quick options Today, This Week, or This Month, or select a custom start and end date using the calendar. Click SAVE to load the dashboard.
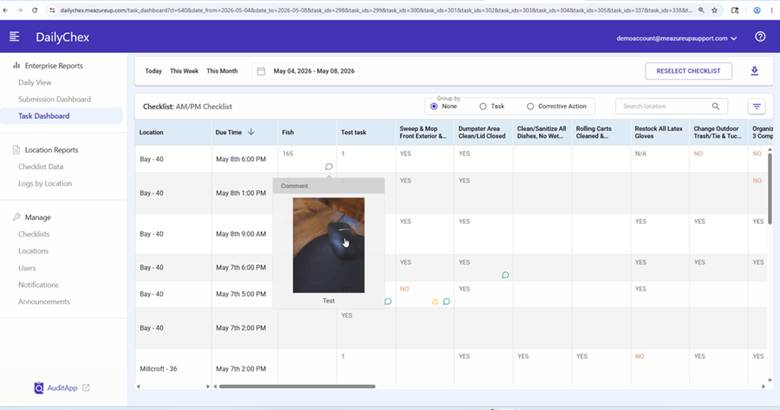
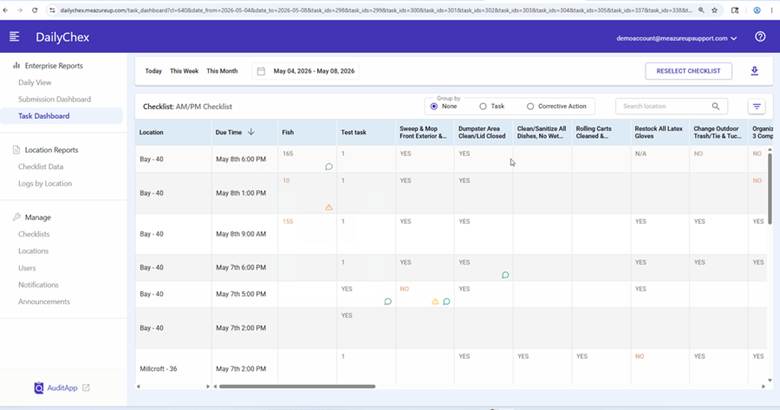
Reading the Dashboard
The dashboard displays a table with each location and submission listed by due time. Each selected task appears as a column, showing the response recorded for that submission (e.g., YES, NO, N/A, or a numeric value). Responses shown in orange indicate a flagged or corrective-action item.

Where a comment or photo icon appears in a cell, hover over it to preview the attached note or image.
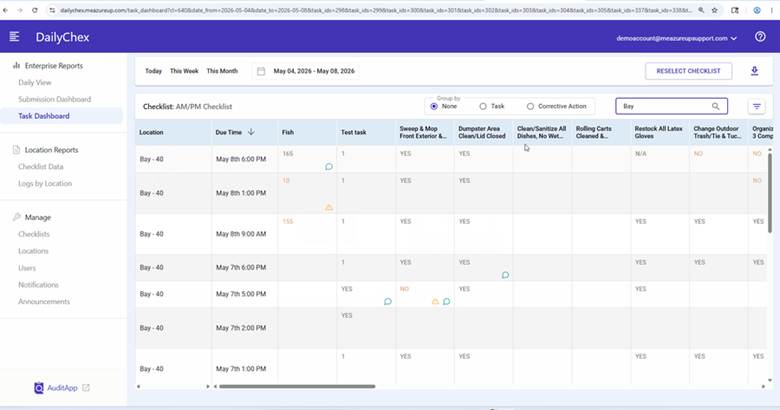
Filtering and Searching
Use the Search location field in the top-right to filter results to a specific location by name.
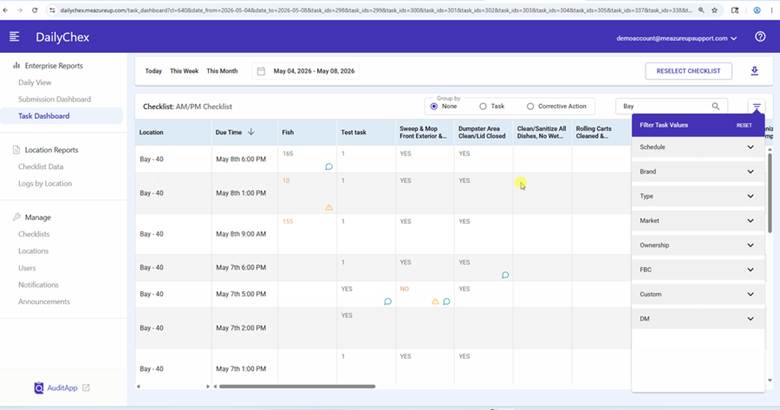
Click the filter icon to open the Filter Task Values panel. This allows you to narrow results by Schedule, Brand, Type, Market, Ownership, and other custom attributes.
Use the Group by radio buttons to reorganize the table view by None, Task, or Corrective Action.
Changing the Checklist or Date
To switch to a different checklist, click RESELECT CHECKLIST in the top-right corner. To change the date range, click the date picker at the top of the page and select a new range.
Exporting Data
Click the download icon in the top-right corner to export the current view to a CSV file. The file will open in Excel and include all visible rows and task columns for the selected checklist and date range.